10 Beginner Woodworking Projects You Can Finish in a Weekend
10 Beginner Woodworking Projects. Getting started with woodworking doesn’t mean you need a full workshop, years of experience, or endless free time. In fact, some of the most satisfying woodworking projects are small, practical builds you can complete in a single weekend.
If you’re new, you may want to start with our complete guide to essential woodworking tools for beginners before diving into your first build.
1. Simple Wooden Shelf

A basic wooden shelf is one of the best starter projects. You’ll practice measuring, cutting straight lines, drilling pilot holes, and mounting hardware.
For tool recommendations, see our guide on woodworking measuring tools every beginner should own.
- Skills learned: measuring, level installation, fastening
2. Rustic Coffee Table

Rustic coffee table beginner woodworking project
A rustic coffee table introduces you to frame construction and basic joinery. Using construction lumber or reclaimed wood keeps costs low.
If you want detailed plans, check out our beginner furniture woodworking projects guide.
- Skills learned: frame assembly, sanding, finishing
3. Wooden Birdhouse
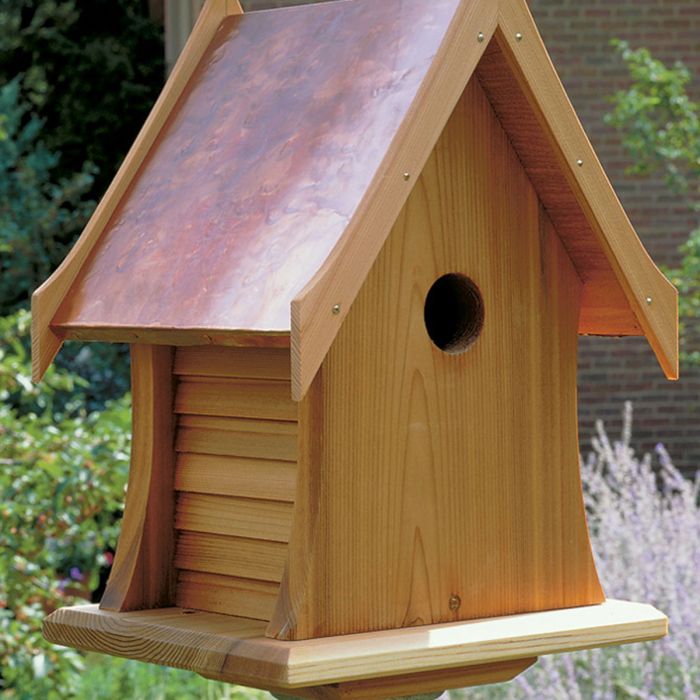
Birdhouses are classic beginner projects and perfect for scrap wood.
Learn more about safe materials in our article on choosing the best wood for beginner projects.
- Skills learned: angled cuts, small assembly
4. Storage Crate or Box

A wooden storage crate helps you master square corners and clean assembly.
For joinery tips, see basic woodworking joints explained for beginners.
- Skills learned: box construction, squaring joints
5. Small Side Table

Side tables are confidence-building projects that look impressive but remain beginner-friendly.
You’ll want clamps for this build — here’s our review of the best woodworking clamps for beginners.
- Skills learned: leg alignment, tabletop attachment
6. Wooden Planter Box

Planter boxes are forgiving outdoor projects and perfect for learning fast assembly.
See our full guide on outdoor woodworking projects for beginners for more ideas.
- Skills learned: exterior assembly, weatherproofing
7. Bench-Top Tool Organizer

A bench-top organizer keeps your tools accessible and saves time on every future project.
Pair this with our woodworking workshop organization tips.
- Skills learned: layout planning, compartment sizing
8. Wooden Picture Frame

Picture frames teach precision cuts and tight-fitting joints.
For cutting accuracy, read our guide on how to make accurate miter cuts.
- Skills learned: miter cuts, precision fitting
9. Simple Workbench

A sturdy workbench is the foundation of every woodworking shop.
We break this down step by step in our beginner DIY workbench plans.
- Skills learned: structural framing, leveling
10. Scrap Wood Projects

Scrap wood projects let you practice without pressure or waste.
Browse more ideas in our scrap wood woodworking projects guide.
- Skills learned: creativity, problem-solving
Final Thoughts
These beginner woodworking projects are designed to build confidence fast while producing real, usable results. Each project prepares you for more advanced builds as your skills grow.
For a structured learning path, explore our main hub:
Beginner Woodworking Projects – Complete Starter Guide
A Guide to Cutting Finger Joints. Finger joints, also known as box joints, are a classic woodworking joint known for their strength, clean appearance, and versatility. They are commonly used in boxes, drawers, cabinets, and furniture corners where both durability and visual appeal matter.

A Guide to Cutting Finger Joints
In this guide to cutting finger joints, you’ll learn what finger joints are, why they’re useful, the tools required, and step-by-step methods to cut them accurately—even in a home workshop.
What Are Finger Joints?
Finger joints consist of evenly spaced rectangular “fingers” cut into the ends of two boards. When interlocked and glued together, these fingers create a strong mechanical bond with a large surface area for glue.
Unlike butt joints, finger joints resist pulling apart and twisting, making them ideal for projects that need strength without visible fasteners.
Why Use Finger Joints in Woodworking?
Finger joints are popular for several reasons. First, they are extremely strong due to the increased glue surface. Second, they are visually attractive, especially when cut cleanly and aligned precisely. Finally, they are versatile and work well with many types of wood.
Finger joints are commonly used for:
- Wooden boxes and storage crates
- Drawer construction
- Small cabinets
- Decorative furniture corners
For beginners looking to move beyond basic joints, finger joints are an excellent next step.
Tools Needed to Cut Finger Joints
You don’t need an advanced workshop to cut finger joints, but accuracy is essential. Common tools include:
- Table saw or router
- Finger joint jig (shop-made or commercial)
- Clamps
- Measuring tools and square
- Wood glue
A jig is the most important component. It ensures consistent spacing and prevents errors that can ruin the joint.
Method 1: Cutting Finger Joints with a Table Saw
Using a table saw with a finger joint jig is one of the most popular methods.
Step 1: Set up a dado blade or standard blade depending on finger width. The blade width determines the size of each finger.
Step 2: Attach the jig to the miter gauge and align the indexing pin with the blade.
Step 3: Make the first cut, then slide the board over the indexing pin to position the next cut.
Step 4: Repeat the process until the entire edge is cut.
Repeat the same process for the mating board, ensuring proper alignment so the fingers interlock cleanly.
Method 2: Cutting Finger Joints with a Router
A router table fitted with a straight bit can also be used to cut finger joints. This method is quieter and often preferred for smaller projects.
Step 1: Install a straight router bit sized to match the desired finger width.
Step 2: Use a finger joint jig or router fence with an indexing pin.
Step 3: Make shallow passes to avoid tear-out and maintain control.
This method provides excellent results when done carefully.
Tips for Perfect Finger Joints
Accuracy is the key to clean finger joints. Always test your setup on scrap wood before cutting final pieces.
- Use sharp blades and bits
- Double-check measurements
- Clamp workpieces securely
- Sand lightly after assembly
If joints are too tight, lightly sand the fingers. If too loose, adjust the jig spacing and recut.
Gluing and Assembling Finger Joints
Apply glue evenly to all mating surfaces. Assemble the joint carefully and use clamps to apply even pressure. Avoid over-tightening, which can squeeze out too much glue.
Wipe away excess glue before it dries to maintain a clean appearance.

A Guide to Cutting Finger Joints
Final Thoughts
Finger joints combine strength, precision, and visual appeal, making them one of the most rewarding joints to learn. While they require patience and accuracy, the results are well worth the effort.
If you’re building your skills and want a structured learning path, explore our complete beginner resource: Home Woodworking for Beginners.
]]>A woodworking bench clamp is one of the most important tools in any home workshop. While many woodworkers focus on cutting and shaping tools, proper clamping is what keeps your work accurate, safe, and enjoyable. Bench clamps are specifically designed to hold workpieces firmly against a workbench, allowing you to work with confidence and precision.
Whether you’re sanding, drilling, planing, or assembling a project, a reliable bench clamp can make a huge difference in the quality of your results.
What Is a Woodworking Bench Clamp?

Woodworking Bench Clamp
A woodworking bench clamp is a clamping device designed to secure wood directly to a workbench. Unlike portable clamps that hold pieces together, bench clamps anchor your project to the bench itself, preventing movement during work.
Bench clamps are commonly used with workbenches that include dog holes, slots, or clamp tracks, but many styles can also be mounted directly to the bench surface.
Why Bench Clamps Are Essential in Woodworking
Stability is critical in woodworking. Even slight movement can lead to inaccurate cuts, uneven sanding, or dangerous tool slips. Bench clamps eliminate this problem by keeping your workpiece firmly in place.
They are especially useful for:
- Sanding flat surfaces
- Planing boards
- Drilling precise holes
- Routing edges
- Chiseling joints
For beginners, bench clamps provide extra control and reduce the risk of mistakes or injuries.
Types of Woodworking Bench Clamps
There are several types of bench clamps available, each suited to different workshop setups and tasks.
Bench Dog Clamps: These clamps fit into dog holes on a workbench and apply pressure horizontally or vertically. They are ideal for holding boards flat on the bench.
Quick-Release Bench Clamps: These clamps allow for fast adjustment and are perfect for repetitive tasks or frequent repositioning.
Fixed Bench Clamps: Mounted directly to the bench, these clamps provide strong, consistent holding power for heavy-duty work.
Hold-Down Clamps: Designed to apply downward pressure, these clamps are excellent for planing and sanding operations.
Key Features to Look for in a Bench Clamp
When choosing a woodworking bench clamp, focus on features that match your type of work.
Clamping Force: Strong holding power ensures your workpiece stays put, even during aggressive tasks like planing.
Ease of Adjustment: Quick and smooth adjustment saves time and reduces frustration.
Compatibility: Make sure the clamp fits your workbench design, including dog hole size or mounting options.
Durability: Metal clamps generally last longer and handle heavier workloads than plastic models.
How Many Bench Clamps Do You Need?
The number of bench clamps you need depends on the size and type of projects you work on. For most home woodworkers, two to four bench clamps provide enough flexibility for everyday tasks.
Larger projects or frequent bench work may require additional clamps to hold longer boards or multiple pieces at once.
Bench Clamps vs Portable Clamps
Portable clamps such as F-clamps and bar clamps are incredibly versatile, but they are not always ideal for securing workpieces to a bench. Bench clamps excel at holding wood flat and stable during hands-on operations.
Most workshops benefit from having both. Portable clamps handle assembly and glue-ups, while bench clamps provide stability during shaping and finishing.
Final Thoughts on Woodworking Bench Clamps
A woodworking bench clamp is a foundational tool that improves accuracy, safety, and efficiency in your workshop. By keeping your work firmly in place, bench clamps allow you to focus on craftsmanship rather than control.
If you’re building your home workshop or upgrading your setup, bench clamps are an investment that pays off in better results and greater confidence. For a complete beginner guide to tools and workshop setup, visit our main resource: Home Woodworking for Beginners.
]]>Woodworking corner clamps are one of the most valuable tools you can add to your workshop, especially if you build cabinets, boxes, frames, or furniture. These clamps are designed to hold pieces of wood at a perfect 90-degree angle, making assembly easier, more accurate, and far less frustrating.

Woodworking Corner Clamps
Whether you’re a beginner working from a small home workshop or an experienced DIYer tackling more advanced builds, corner clamps can dramatically improve the quality of your projects.
What Are Woodworking Corner Clamps?
Woodworking corner clamps—also known as right-angle clamps—are tools specifically designed to hold two pieces of wood together at a 90-degree angle. Unlike standard clamps, which mainly apply pressure in one direction, corner clamps align and secure joints at the same time.
This makes them ideal for projects where square corners are critical. Boxes, drawers, frames, cabinets, and shelving units all benefit from the accuracy that corner clamps provide.
Why Corner Clamps Are So Important in Woodworking
Achieving perfectly square corners by hand can be difficult, especially when glue is involved. Wood can shift as clamps are tightened, leading to uneven joints and misaligned builds.
Corner clamps solve this problem by locking pieces into position before you apply pressure. This ensures your joints stay square while the glue dries or while you drill and fasten screws.
They are particularly useful for:
- Cabinet and drawer construction
- Picture frames and frames of all sizes
- Box and crate projects
- Furniture assembly
For beginners, corner clamps reduce mistakes and make woodworking more enjoyable.
Types of Woodworking Corner Clamps
There are several types of corner clamps available, each suited to different woodworking needs.
Single-Handed Corner Clamps: These clamps allow you to secure pieces with one hand, leaving the other free to position your work. They are ideal for solo woodworkers.
90-Degree Angle Clamps: These clamps are fixed at a right angle and provide consistent accuracy. They are perfect for repetitive tasks like cabinet assembly.
Corner Clamp Sets: Some projects require multiple clamps at once. Sets allow you to clamp all corners of a project simultaneously, keeping everything aligned.
Key Features to Look for in Corner Clamps
When choosing woodworking corner clamps, it’s important to focus on build quality and usability.
Material Strength: Metal clamps are more durable and provide stronger holding power, while plastic clamps are lighter and suitable for small projects.
Jaw Capacity: Make sure the clamp can accommodate the thickness of the wood you typically use.
Ease of Adjustment: Smooth adjustment mechanisms save time and reduce frustration during assembly.
Stability: A stable clamp keeps your workpiece from shifting while tightening.
How Many Corner Clamps Do You Need?
The number of corner clamps you need depends on the projects you build. For most home woodworkers, starting with two clamps is sufficient. This allows you to secure opposite corners while checking alignment.
For box or cabinet projects, owning four corner clamps allows you to secure all corners at once, resulting in faster assembly and better accuracy.
Corner Clamps vs Standard Clamps
Standard clamps like F-clamps and bar clamps are versatile, but they aren’t designed to hold pieces at a precise angle. Corner clamps fill this gap by combining alignment and pressure into one tool.
Most workshops benefit from having both. Standard clamps provide overall pressure, while corner clamps ensure accuracy at the joints.
Final Thoughts on Woodworking Corner Clamps
Woodworking corner clamps are a must-have tool for anyone who builds square projects. They improve accuracy, reduce mistakes, and make assembly faster and more enjoyable.
If you’re serious about improving your carpentery skills, investing in quality corner clamps is a smart move. For a complete beginner roadmap and tool guidance, visit our main guide: Home Woodworking for Beginners.
]]>Best Woodworking F-Clamps. F-clamps are one of the most versatile and essential tools in any woodworking workshop. Whether you’re a beginner building simple projects at home or a more experienced woodworker tackling furniture builds, having the right F-clamps can make your work safer, easier, and more accurate.
In this guide, we’ll explain what woodworking F-clamps are, why they’re so useful, how to choose the best ones, and what features matter most when buying them.
What Are Woodworking F-Clamps?

Best Woodworking F-Clamps. F-clamps
F-clamps are named after their distinctive “F” shape. They consist of a long metal bar with a fixed jaw on one end and an adjustable sliding jaw on the other. A threaded screw handle allows you to apply pressure and hold wood pieces firmly in place.
Because of their design, F-clamps can apply strong, even pressure while remaining lightweight and easy to handle. This makes them ideal for gluing, assembling, drilling, and holding workpieces steady during cuts.
Why F-Clamps Are Essential for Woodworking
One of the biggest advantages of F-clamps is their versatility. They can be used for small craft projects as well as larger furniture builds. Unlike some clamps that are limited to specific sizes or tasks, F-clamps adapt easily to different woodworking needs.
They are especially useful for:
- Gluing boards and panels
- Holding pieces square during assembly
- Securing wood while drilling or sanding
- Temporary positioning of parts before fastening
For home woodworkers, F-clamps offer professional-level holding power without taking up much storage space.
Key Features to Look for in the Best F-Clamps
Not all F-clamps are created equal. When choosing the best woodworking F-clamps, there are several important features to consider.
Bar Strength: A strong steel bar prevents bending under pressure. Heavier-duty bars are better for large projects, while lighter bars are perfect for small jobs.
Jaw Capacity: Jaw opening determines how thick a project the clamp can handle. It’s smart to own a variety of sizes for different tasks.
Throat Depth: This measures how far the clamp can reach into a workpiece. Deeper throats are useful for panels and wide boards.
Handle Comfort: Ergonomic handles make tightening easier and reduce hand fatigue during longer projects.
Heavy-Duty vs Light-Duty F-Clamps
Heavy-duty F-clamps are built for strength and durability. They’re ideal for furniture building, large glue-ups, and projects requiring significant pressure. These clamps are often made from thicker steel and feature reinforced jaws.
Light-duty F-clamps, on the other hand, are perfect for beginners and small projects. They’re easier to handle, less expensive, and great for light assembly work.
Most home woodworkers benefit from owning a mix of both types.
How Many F-Clamps Do You Need?
A common saying in woodworking is that you can never have too many clamps. While that may be true, beginners can start with a small, practical set.
A good starting point is:
- Two small F-clamps (6–8 inches)
- Two medium F-clamps (12–18 inches)
- One or two large F-clamps (24 inches or more)
As your projects grow in size and complexity, you can expand your collection over time.
Final Thoughts on the Best Woodworking F-Clamps
F-clamps are a must-have tool for any woodworking workshop. They are affordable, versatile, and incredibly useful for a wide range of projects. By choosing high-quality clamps with strong bars, comfortable handles, and the right jaw capacity, you’ll improve both the quality and safety of your work.
If you’re just starting out, focus on a small selection of reliable F-clamps and build your collection as needed. For a complete beginner roadmap, visit our main guide: Home Woodworking for Beginners.
]]>
Essential Woodworking Tools for Beginners
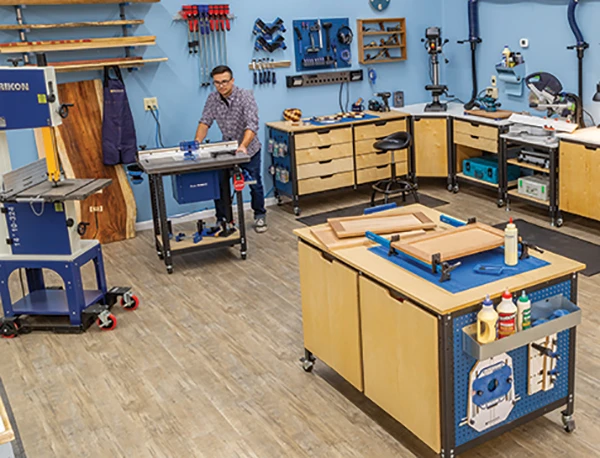
Essential Woodworking Tools for Beginners at Home. Starting woodworking at home can be exciting, rewarding, and surprisingly affordable—if you know which tools you actually need. Many beginners make the mistake of buying too much too soon. The truth is, you can build impressive projects with a small, carefully chosen set of woodworking tools.
In this guide, we’ll cover the essential woodworking tools for beginners, explain what each tool does, and help you avoid wasting money on unnecessary equipment.
Basic Hand Tools Every Beginner Needs
Hand tools form the foundation of woodworking. They are affordable, easy to learn, and perfect for home workshops with limited space.
Measuring Tape: Accurate measurements are crucial in woodworking. A durable tape measure helps ensure your cuts and joints line up perfectly.
Claw Hammer: Used for driving nails and pulling them out. Choose one with a comfortable grip and balanced weight.
Chisels: Wood chisels are essential for shaping joints, cleaning edges, and carving details. A small set covering different sizes is ideal.
Hand Saw: A quality hand saw allows you to cut wood accurately without electricity, making it ideal for beginners.
These tools alone allow you to complete many simple woodworking projects at home.
Power Tools That Make Life Easier
While hand tools are essential, power tools can dramatically speed up your work and improve precision.
Electric Drill: One of the most important tools you’ll ever own. It’s used for drilling holes and driving screws.
Circular Saw: Ideal for making straight cuts in boards and plywood. It’s more affordable and compact than a table saw.
Orbital Sander: Sanding by hand can be tiring. An orbital sander helps you achieve smooth finishes quickly and evenly.
As your skills grow, you can gradually expand your tool collection.
Workshop Essentials Most Beginners Forget
Some of the most important woodworking tools aren’t cutting tools at all.
Clamps: These hold your projects securely while glue dries or while you work. You can never have too many clamps.
Safety Gear: Always wear safety glasses, hearing protection, and a dust mask to protect yourself.
Workbench: A sturdy surface makes woodworking safer and more enjoyable. Even a simple DIY bench works well.
Final Thoughts
You don’t need a fully stocked workshop to start woodworking at home. By focusing on these essential woodworking tools for beginners, you’ll save money, learn faster, and enjoy the process far more.
Once you’re comfortable with the basics, you can explore more advanced tools and projects with confidence.
Next step: Check out our complete guide on Home Woodworking for Beginners to continue your journey.
]]>10 Beginner Woodworking Projects You Can Finish in a Weekend

10 easy beginner woodworking projects
Discover 10 easy beginner woodworking projects you can complete in a weekend. Perfect for skill-building and adding handmade charm to your home.
Introduction
If you’re new to woodworking, you don’t need expensive tools or years of experience to create something amazing. In fact, many beginner woodworking projects can be completed in just one weekend, giving you the instant satisfaction of turning raw wood into a functional or decorative piece. Whether you want to improve your skills, decorate your home, or make thoughtful gifts, these 10 easy woodworking ideas are the perfect starting point.
1. Simple Bookshelf
A classic beginner project, the simple bookshelf requires only straight cuts and basic joinery. Use pine or plywood to keep costs low, and finish with stain or paint for a custom look.
Quick Tip: Measure your tallest books before deciding the shelf spacing. Get your own Bookshelf Plans
2. Wooden Picture Frame
Picture frames are small, inexpensive, and perfect for practicing precision cuts. Once built, you can personalize them with paint, stain, or carvings.
Pro Tip: Use a miter saw for perfect 45° angles at the corners. Wooden Picture Frame Plans
3. Rustic Wooden Coasters
Cut small squares or circles from scrap wood, sand smooth, and seal with a waterproof finish. These make great gifts and protect your furniture from water rings. Rustic Wooden Coasters Plans
4. Floating Shelves
A stylish and space-saving project. Floating shelves work in any room and can be built in just a few hours.
SEO Tip: Search for “floating shelf brackets” — these make installation simple and sturdy. Floating Shelves plans
5. Wooden Planter Box
Planter boxes are perfect for both indoor and outdoor use. Cedar is a great choice because it naturally resists rot. Wooden Planter Box Plans
6. Birdhouse
A timeless woodworking classic. Birdhouses are fun to make, help local wildlife, and allow endless design creativity. Birdhouse Plans
7. Step Stool
A small step stool is practical and teaches you about structural strength in woodworking. Great for kitchens, bathrooms, or workshops. Step Stool Plans
8. Wall-Mounted Key Holder
Combine small hooks with a wooden board for a stylish way to keep your keys organized. Add a mini shelf for mail storage. Wall-Mounted Key Holder Plans
9. Cutting Board
Cutting boards are both functional and beautiful. Use hardwoods like maple or walnut, and finish with food-safe mineral oil. Cutting Board Plans
10. Simple Bench
A straightforward bench can be used indoors or outdoors. It’s a bigger project but still manageable in a weekend. Simple Bench Plans
Conclusion
These beginner woodworking projects prove that you don’t need to be an expert to create something useful and beautiful. Start with a project that excites you, gather your materials, and enjoy the satisfaction of building with your own two hands.
Call to Action:
Ready to start? Gather your tools, pick a project, and make this weekend a woodworking win! Get 16000 plans for your next project
]]>

]]>
Inside Ted’s Woodworking. Are you searching for easy-to-follow woodworking plans that actually help you build real projects without the guesswork? Whether you’re a beginner, a weekend hobbyist, or an experienced DIYer, you’ve probably stumbled upon Ted’s Woodworking—the internet’s most talked-about woodworking package.

Inside Ted’s Woodworking
Boasting over 16,000 woodworking plans, Ted’s Woodworking is promoted as the #1 DIY wood project collection available today. But what do you really get inside? Is it just another overhyped product—or a serious resource worth the investment?
In this article, we’ll take a deep dive inside Ted’s Woodworking, show you exactly what’s included, who it’s for, and how it stacks up against other woodworking guides. Let’s cut through the fluff and see if it truly delivers on its promise.
What Is Ted’s Woodworking?
Ted’s Woodworking is a comprehensive digital product created by Ted McGrath, a professional woodworker, educator, and coach. His goal was simple: to create a resource for woodworkers of all levels—especially beginners—who want step-by-step instructions and clear visuals to complete projects successfully.
The product includes everything you need to plan, cut, build, and finish a wide variety of woodworking projects. And we’re not talking about just a few plans—it’s a treasure chest of over 16,000 DIY wood plans, neatly organized into categories.
🔑 SEO Keyword Focus: “DIY Wood Plans”
To help this article rank well, we’re focusing on the high-value keyword: DIY wood plans—which aligns perfectly with user intent for this product.
What’s Inside Ted’s Woodworking?
Here’s exactly what you get when you purchase the full package:
📦 1. 16,000+ DIY Wood Plans
This is the core of the product. The plans range from small home décor projects to large-scale structures like cabins and sheds.
Project categories include:
-
Furniture: chairs, tables, beds, cabinets, and bookcases
-
Outdoor Projects: birdhouses, planters, sheds, pergolas
-
Children’s Items: toy boxes, bunk beds, dollhouses
-
Workshop Tools & Storage: workbenches, jigs, racks
-
Craft Projects: frames, ornaments, signs, puzzles
Each plan is broken down with:
-
Step-by-step instructions
-
Detailed diagrams and measurements
-
Cutting and material lists
-
3D exploded views
✅ SEO Tip: These are ideal for people searching for printable woodworking plans and beginner woodworking instructions.
🎥 2. 150 Premium Step-by-Step Videos

Inside Ted’s Woodworking
Visual learners love this feature. You’ll find tutorials that show real-time builds and demonstrations of woodworking techniques. The videos cover:
-
Basic and advanced joinery
-
Furniture construction
-
Finishing and sanding tips
-
Tool usage and safety
Perfect for both DIYers and beginners, these videos complement the written plans and help you build with more confidence.
📘 3. Beginner’s Woodworking Guide
This detailed manual helps you understand the basics of woodworking before you even start a project. It includes:
-
Tool introductions
-
Measurement techniques
-
Wood types and how to choose the right one
-
Safety guidelines
-
Stain and finish advice
If you’re new to the hobby, this guide alone will save you hours of confusion and potentially costly mistakes.
📐 4. DWG/CAD Plan Viewer
This digital tool is great for users who want to zoom in, edit, or customize woodworking blueprints. You can take any plan and personalize dimensions, add new components, or simplify based on available tools and skill.
🔧 Useful for intermediate woodworkers who want more control over designs.
📖 5. Bonus Carpentry Guide & Lifetime Updates
The package also includes:
-
A comprehensive carpentry techniques guide
-
Free updates for life with newly added plans
-
Customer support if you get stuck
Pros and Cons of Ted’s Woodworking

Inside Ted’s Woodworking
✅ Pros:
-
Great for beginners and hobbyists
-
Massive variety of projects
-
Diagrams and step-by-step format make it easy to follow
-
Excellent value for the price
-
Instant download or DVD option available
-
Learn at your own pace
❌ Cons:
-
The sheer number of plans may feel overwhelming
-
Some older plans may look dated (but are still usable)
-
You need to be organized to avoid project clutter
Who Is It Best For?
Ted’s Woodworking is a solid fit for:
-
🧰 Beginners who need clear guidance
-
🪚 DIY enthusiasts looking for weekend projects
-
🧒 Parents and grandparents who want to build fun projects with kids
-
🏡 Home improvers looking to save money on furniture or décor
-
💼 Side hustlers selling handmade wood products
Real User Testimonials
“I was skeptical at first, but after building a shelf and a bench from the plans, I’m hooked. It’s super beginner-friendly.” – Kevin M.
“I started with zero experience. Thanks to Ted’s plans, I now have a handmade coffee table in my living room!” – Joanna S.
“The videos and cut lists are gold. I’ve built three projects with my son—great bonding time!” – Carlos F.
Is Ted’s Woodworking Worth It?
If you’re searching for DIY wood plans that are:
-
Affordable
-
Beginner-friendly
-
Easy to follow
-
Visually detailed
-
Printable and accessible anywhere
Then yes—Ted’s Woodworking is 100% worth it.
For a one-time price, you get more woodworking guidance than many expensive online courses or books.
🛒 Bonus: What You’ll Save
Compare the cost of hiring a carpenter or buying pre-made furniture, and you’ll quickly realize the savings:
-
Birdhouse: $25 retail → Build for $5
-
Bookshelf: $150 retail → Build for $30
-
Workbench: $300 retail → Build for $50
Final Thoughts: Inside the Best DIY Wood Plans Online
Ted’s Woodworking delivers more than just plans—it gives you the confidence to build, the freedom to create, and the tools to become self-sufficient in your craft. Whether you’re starting from scratch or want to take your hobby to the next level, this package makes DIY woodworking truly accessible.
🔗 Ready to Build Something?
Download your copy of Ted’s Woodworking today and start your first project this weekend!
👉 Click here to get instant access
]]>
Woodworking Made Easy: Step-by-Step Projects from Ted’s Plans
Woodworking Made Easy. Woodworking doesn’t have to be hard. In fact, with the right guidance, it can be one of the most rewarding, beginner-friendly hobbies you’ll ever try. Whether you want to build a birdhouse, a bookshelf, or even a shed — there’s no reason to feel intimidated. The secret? Step-by-step, foolproof instructions. And that’s exactly what Ted’s Woodworking Plans deliver.

Woodworking Made Easy
If you’ve been itching to create something with your hands but don’t know where to start, this guide will walk you through how Ted’s plans make woodworking easy — even if you’ve never used a saw before.
Let’s dive in.
Why Step-by-Step Projects Matter
When most people try woodworking for the first time, they run into three big problems:
-
Plans are too vague or technical
-
Instructions skip steps or use confusing terminology
-
They don’t know what materials or tools to buy
This leads to frustration, wasted money, and unfinished projects.
Ted McGrath, a certified master woodworker, understood these challenges. That’s why he created Ted’s Woodworking — a library of over 16,000 step-by-step woodworking projects, crafted specifically with beginners and hobbyists in mind.
What Makes Ted’s Plans So Beginner-Friendly?
Ted’s plans are more than just blueprints. They’re full tutorials, with all the details you need laid out in an easy-to-follow format.
1. Simple, Clear Instructions
Each project includes a written walkthrough in plain English. No confusing carpentry lingo or skipped steps. Whether you’re cutting, drilling, sanding, or assembling — the steps are clear.
2. Detailed Materials Lists
Every plan tells you exactly what wood to buy, what sizes to cut, and which tools you’ll need — down to the screws and hinges.
3. 3D Diagrams & Color Schematics
Visuals matter, especially for beginners. Ted’s plans include full-color 3D diagrams with labels for each piece, so you can see exactly how everything fits together.
4. Suitable Projects for All Skill Levels
While the package contains advanced builds like gazebos and cabins, there are hundreds of easy projects to start with, like:
-
Toolboxes
-
Picture frames
-
Shoe racks
-
Floating shelves
-
Toy chests
-
Garden planters
Step-by-Step Sample Project: Build a Wooden Birdhouse
Let’s take a look at one of the easiest and most rewarding beginner projects from Ted’s Woodworking: a classic birdhouse.
🧰 Tools Needed:
-
Hand saw or jigsaw
-
Hammer
-
Screwdriver
-
Drill
-
Tape measure
-
Sandpaper
🪵 Materials List:
-
1 plank of 1” x 6” pine board
-
Wood screws
-
Non-toxic wood glue
-
Hinges (optional, for a clean-out door)
-
Exterior paint or wood stain
🪚 Step-by-Step Instructions:
-
Measure and Cut
Use the plan’s cutting diagram to mark and cut 6 pieces: front, back, base, two sides, and roof. -
Drill the Entrance Hole
Use a hole saw to create a 1.25–1.5” hole in the front piece. -
Assemble the Walls
Glue and screw the sides to the base, then attach the front and back. -
Attach the Roof
Slightly overlap the roof pieces for rain protection. Attach with screws. -
Sand and Paint
Smooth rough edges, then paint or stain the house with bird-safe finishes. -
Mount the Birdhouse
Attach to a post, fence, or tree with screws. Done!
Each step in the project above is accompanied by full visuals in Ted’s guide, making it truly foolproof for a first-timer.
Real Projects Built Using Ted’s Plans
Thousands of hobbyists, retirees, and even teens have used Ted’s plans to build amazing things like:
-
Rustic farmhouse tables
-
Wooden rocking chairs
-
Storage benches
-
Playhouses for kids
-
Firewood racks
-
Home bars
-
Floating wall shelves
The plans are broken down by category (furniture, crafts, outdoor, small projects, etc.), so you can easily find something that matches your interest and skill level.
Why These Projects Help You Learn Fast
When a plan is broken into manageable, visual steps — the learning curve disappears. Each time you finish a project, you build confidence and gain experience using tools and techniques like:
-
Measuring accurately
-
Making straight cuts
-
Drilling and assembling
-
Sanding and finishing
-
Joining wood with nails, screws, or glue
Ted’s system is designed to teach you by doing, without overwhelming you. That’s a huge advantage over watching random YouTube tutorials that skip critical steps.
What’s Inside Ted’s Woodworking Package?
In addition to the 16,000+ woodworking plans, here’s what else you get:
-
🛠️ Woodworking Guidebook – Covers tools, safety, finishes, joints, and more
-
🎥 Bonus Video Lessons – Watch projects being built step-by-step
-
📐 DWG/CAD Plan Viewer – Great if you want to modify or customize designs
-
📖 Lifetime Updates – New projects added regularly
-
📬 Instant Download + Option for Physical DVDs
FAQs for Beginners
Do I need expensive tools?
No! Most beginner projects can be done with basic hand tools or a small power drill and saw.
Is it worth it if I’ve never done woodworking before?
Absolutely. Ted’s system is designed for people with zero experience. Many users say it’s the first woodworking program that actually made sense.
Can I really build furniture with these plans?
Yes. The plans include everything from small crafts to full-size beds, tables, and cabinets. You’ll start small and move up fast.
Final Thoughts: Start Creating Today
Woodworking can seem complicated, but it doesn’t have to be. With Ted’s step-by-step plans, you’re never left guessing. Each project builds your skill, confidence, and satisfaction — one board at a time.
Whether you’re looking to make gifts, furniture, or just want a fun, productive hobby, Ted’s Woodworking makes it easy.
👉 Ready to Start?
Download the entire Ted’s Woodworking package now and start your first step-by-step project today.
🛠️ Get Instant Access Here